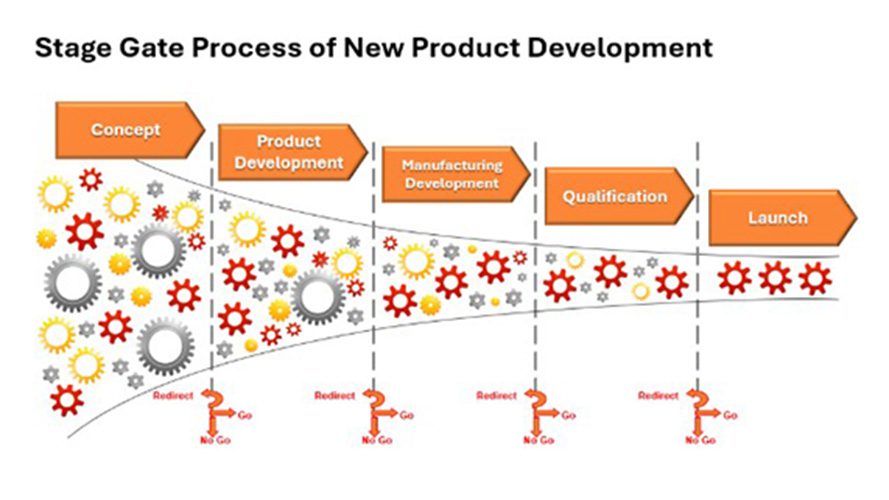
At Inline Plastics, we’ve created many customized plastic food packages for our customers. Today, we’ll walk you through the world of custom packaging — by the end of this document, you’ll better understand how this process works. Don’t worry; we’re here every step of the way.
Getting the Custom Packaging You Need
 Creating a custom piece for your business requires clear and detailed specifications. Be precise about what you want and how the container should function throughout its lifecycle from packaging to consumer use. The more specific your requirements, the better your results will be. For example, if your contents are pineapple spears, if you could provide the exact measurements in width, height, length, weight of each, and total quantity in each container, the more precise the design will be.
We want to make sure you get the perfect package for your needs, so be prepared to answer the questions in the following areas:
Application
- What kind of foods are going into the packaging?
- Does the food have liquid components?
- Will it contain foods that emit gases, such as leafy greens or onions?
- Different food types have specific packaging needs to preserve freshness, prevent leakage, and extend shelf life. For example, foods with high moisture or foods that emit gases may require breathable or leak-resistant materials.
Dimensions
- What is the exact size of the food you’ll put into the container?
- What is the shape of the product? For example, are you packaging celery sticks or sliced carrots? Will it be round like a cake or wide like short ribs?
Knowing the exact size and shape of your food ensures the contents fit properly, protects the product, enhances the presentation, increases sales, which helps with efficient storage and display.
Weight
- Will the products be heavy?
- Is the application salad? Guacamole? Mashed potatoes?
- Will the containers need to be stacked?
- If so, how many packages will be stacked high?
Just like a human pyramid requires the strongest participants at the base, packages with heavy contents need strong structural support on the bottom. Accurate weight considerations ensure the packaging provides structural integrity for stacking, shipping, and retail display.
Temperature variations
- Will the contents need to be frozen?
- Are they packaged locally or pre-packaged and transported to point of sale?
- Will the food going into the package be served hot?
- Will the food be purchased cold and need to be heated up by the consumer?
Understanding the temperature variations ensures the packaging can withstand the changes, preserve food quality during transport, and remain safe and functional whether frozen, refrigerated, microwaved, or kept under a heat lamp.
Shipping
If your product needs to be shipped, it’s critical to think through how it will move through the supply chain — from your facility to store shelves or consumers’ hands.
- Where is it going?
- How far will it travel, and by what method — truck, air, or sea?
- Will it be packed in a corrugated case or plastic crate?
- Are you planning to keep your existing corrugate packaging, or is this an opportunity to redesign it for better efficiency or protection? This decision can impact how your primary packaging is designed to fit inside the case and how everything stacks on a pallet.
- Is your product going to be shipped alone or alongside other items? Mixed-product shipments can require special attention to stacking, spacing, and weight distribution. Uniform packaging that stacks neatly can streamline palletization and reduce the risk of shifting or damage in transit.
Proper planning for shipping not only protects the product, but also improves space efficiency, reduces freight costs, and ensures a smoother logistics process. Packaging should be durable enough to handle the rigors of transportation while still fitting optimally into cartons, cases, or pallets — especially for long-haul distribution.
On The Shelf
Shelf placement and merchandising- consider how many packages will be displayed and the intended presentation.
- Are there requirements for shelf dimensions? Length X Width X Height
- What is the shelf type? Are they flat, slanted, or spring-loaded?
- Are there requirements on how many packages need to fit front to back and side by side, stacked?
- Are there any space limitations that the custom package will need to comply with?
- Will the products be displayed flat or vertically?
Shelf presentation significantly impacts consumer appeal and sales, so packaging must align with shelf space, merchandising strategy, and shelf-management (first-in-first-out — “FIFO”), ensure visibility, convenience, and profitability.
Custom Package – What You Should Consider
- What’s going in the package
- Is this replacing a current package or is it new?
- If replacing current packaging, will you need to replace any shipping corrugate in your logistics with the packaging dimension changes?
- Required inside dimensions to fit the contents: Length (L) x Width (W) x Height (H)
- Shape (Rectangle, Round, Square)
- Contents total weight within package
- Environment required during packing, shipping, and on shelf (hot, ambient, cold)
- How will the contents be packed (manually, automation)
- Shipping logistics (from/to)
- Shelf requirements L x W x H
- Stacking Requirements (# stacked high)
Are There Qualifications to Develop Custom Packaging?
This specialized work requires investment to cover the costs. Depending on the product, and complexity of the design, Inline Plastics requires a commitment of 1-5 million pieces annually, but we are flexible.
Before you begin the process of ordering a customized package, please visit our digital catalog for inspiration. We offer an extensive range of products and can often meet your needs with what’s already available depending on the expectations.
Does this sound like the right solution for you? Contact your distributor, supplier, or Inline directly to review your request and assess feasibility and minimum order requirements.

The Product Development Process
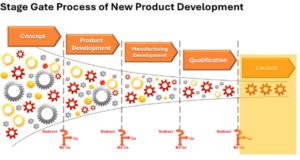
At Inline Plastics, we follow a five-stage development process with “stage gates” (or approvals) between them: Concept, Product Development, Manufacturing, Qualification, and Launch.
The timeline from concept to launch can vary depending on the complexity of the custom package as well as customer response time. The rough timeline for each stage outlined below is reflected by our experience with customers working through alignment across their internal teams. For example, a minor change in the height of an existing off-the-shelf package would typically be launched sooner than a more complex change to the overall footprint or design involving length and width. Nevertheless, crafting the perfect package takes time.
Stage #1: Concept

During the concept stage depending on complexity, we’ll review in detail all the information on the product’s desired outcome, discussing the answers to those questions we mentioned earlier. The more details you can give us upfront, the faster we’ll get your product to market. Think of it like building a house — it’s much easier to move a wall on the blueprint than after the foundation is poured! Small adjustments early on prevent headaches later. Late-stage changes may take additional time, as they often require revisiting earlier steps in the process. We’re just as committed to getting your product to market efficiently and successfully as you are — and the more aligned we are, the better the outcome.
The first step is usually creating simple hand-drawn sketches to align on the design. Once that is reviewed and approved, the next steps involve building more detailed drawings. Once those are approved, physical prototypes, also known as “rapid prototypes,” will be created letting you see how the product will look like shape and size wise. This will allow you to test how your food fits in, but the finish of the product will not be smooth. We call this form and fit testing, as their functionality is limited at this point.
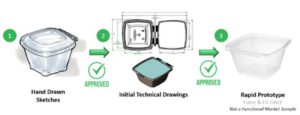
At this stage, initial calculations will be made based on these early product specifications and create an early ballpark estimate on pricing per piece. Please note since final product details aren’t yet confirmed, pricing will fluctuate up or down 10%. Final tooling configurations and “gauge” (or thickness) of material are both extremely important in defining the price which are not yet defined at this point. The estimated annual quantity is a key factor in determining the combination of tool size and machine we will use- which play a large role in final pricing. That is why we provide a ballpark estimate at this stage. Keep in mind: this stage typically requires several cycles to ensure we find the perfect balance between your specific needs and high-quality repeatable manufacturability, a standard that Inline customers have come to expect over the past few decades. After you give us the green light (approval), things get interesting. The prototype tooling is now ordered which kicks off the next stage called Product Development.
Concept Stage Recap
Time: 3-6 weeks
- Concepting: Hand-drawn sketches
- Initial Technical Drawings – *Check labels and shelf space: will they fit? – Approval
- Rapid Prototypes – Approval
- Test Contents for Form/Fit ONLY – Approval
- Ballpark Pricing
- All Stakeholders Alignment
- Gate action item to next stage- Order Prototype tool
Stage #2: Product Development
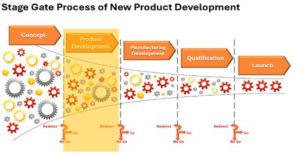
By the time we enter the product development stage you will have approved the initial technical drawings and rapid prototypes, and the prototype tooling will have been ordered. This is a small tool bed that can produce one production-quality container at the time, used for market testing for form, fit, and function. These are referred to as “market samples.”
It is important that these market samples undergo end-to-end performance testing, involving a limited number of stores to evaluate the entire process—from packing to consumer. Staying aligned throughout the process is essential, as close communication and collaboration are key to ensuring both speed and success in development. Ideally, there should be no changes between the rapid prototype and the market sample; however, it is during this testing that we may find some adjusting is necessary.
Once you have successfully tested the market samples, the next steps are to:
- Align on a targeted go-live launch date for your project
- Provide a weekly ramp up for the first 3 months
- First 6-month forecast
- Provide an estimated annual forecast
This information will ensure that:
- We order sufficient raw material
- We have selected the right machine and tooling combination for your production requirements
- We are aligned on the go-live date launch date for inventory readiness
- The production schedule can support your inventory demand
Product Development Stage Recap
Time: 8-10 weeks
- Market Samples Produced
- Test Market Samples Tested End-To-End. Successful?
- Market Samples- Approval
- Launch Date Alignment
- Refined Pricing- not yet final
- Weekly Forecast – First 3 Months
- Determine Best Production/Inventory Locations
- First 6 months Forecast & Estimated Annual Forecast
- Gate action item to next stage- All Stakeholders Alignment and Approvals
In the next stage, there is considerable investment both financially and in resources. This stage is referred to as manufacturing.
It is at this Go / No Go point a firm approval and commitment to the design must take place. All stakeholders that will be impacted by the packaging change should be involved with this approval.
Stage #3: Manufacturing

Now that the design is complete and market tested, the team is ready to start the build for full-scale manufacturing. This is the most time-consuming stage which can take up to 12-20 weeks depending on the complexity of the project. The production tooling needs to be:
Designed, Engineered, Ordered, Constructed, And Shipped
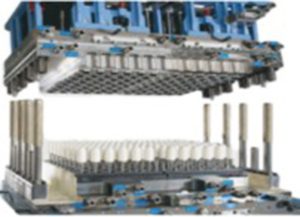 At this stage, significant investment in tooling begins. This is the most financially intensive phase of the project, so clear approval must be made before proceeding.
Final pricing will be confirmed in the month of launch, as it is influenced by monthly fluctuations in raw material costs tied to the resin index. Therefore, the launch price may adjust up or down at that time. However, now that key elements—such as tooling, material gauge, and product design—have been finalized, we are able to provide you with a more accurate preliminary quote. It is important to note that any changes in design could result in financial setbacks.
Manufacturing stage Recap
Time: 12-20 weeks
- Production Tool Designed, Engineered, Ordered, Constructed, and Shipped
Stage #4: Qualification

Item Qualification (IQ) is a crucial stage where we put the tooling into the machine for the first time and run the initial product for quality testing. The product is put through several tests to ensure that it can meet the Critical to Quality (CTQ) specifications that were established earlier during product development stage, before it goes into production.
This is a vital step before production launch. It’s confirming that the production tool is running smoothly, creating the product as intended, meeting all the specifications. Depending on the tool size, this can vary between 1-5 business days in length.
Qualification stage
Time: 1-5 business days
- First run testing with new tooling in production machine
- All CTQs tested and confirmed
- Product Specification Sheet Finalized
- Final Pricing
Stage 5: Launch
In this final stage, “this little package goes to market!” Inventory is built based on the forecast provided in the product development stage. A production schedule was created to support the weekly ramp up needed to support the inventory demands. All CTQs will continue to be monitored during manufacturing. This is where quality ensures you get the best results possible and experience the Inline difference, firsthand! All of the hard work has paid off! High-fives all around!
Launch stage
Time: Typically flows immediately following Qualification
- We build inventory.
- We monitor your annual forecast.
- The team orders additional raw material.
- CTQs monitored
The Whole Package
Remember, packaging must do more than hold your product in today’s food industry. It must tell your story, protect your brand, and add value for your customers.
Knowing when to use custom plastic packaging can give you a significant edge in the market, whether you’re a food processor, a family-owned grocery chain, or a well-established national business. From a unique design to branded packages, custom designs can make your product stand out.
You can demonstrate to your customers that you care about the freshness of your product while differentiating yourself from your competitors. You can choose the size and shape and influence the design of a package. Showcasing the quality of your food through a professional presentation can lead to higher sales and happier customers.
Congratulations! You’ve learned how Inline Plastics produces custom packaging. Are you ready to order custom packaging?